Japan's Passport Revolution: Say Goodbye to Stickers, Hello to eVisas for Indian Travellers!: Here's How You Should Apply
- Admin
- 1 year ago
- 3 minutes read

Effective April 1, Indian travelers can bid farewell to the hassle of physical visa stickers for Japan. Japan's new eVisa program for Indian tourists, managed by VFS Global, revolutionizes the visa application process. Offering a streamlined approach, applicants can now conveniently apply online for single-entry short-term visas tailored for tourism purposes. With a generous stay allowance of up to 90 days, travelers can immerse themselves in Japan's rich culture and scenic landscapes. This milestone not only simplifies travel logistics but also underscores the commitment to strengthening bilateral ties between India and Japan, enhancing the overall experience for Indian visitors to the Land of the Rising Sun.
How to Apply for Japan Visa From India?
To apply for a Japan visa from India, follow these steps:
1.Determine the Type of Visa:
- Identify your purpose of travel to Japan.
- Common types include tourist, business, work, and student visas.
- Gather Required Documents:
- Check the official website for the list of documents.
- Commonly needed items include the visa application form, passport-sized photographs, valid passport, travel itinerary, proof of financial capability, and supporting documents.
- Schedule an Appointment:
- Some centers may require appointments for document submission.
- Complete the Application Form:
- Fill it accurately and completely.
- Submit Your Application:
- Visit the designated center or embassy/consulate.
- Provide Biometric Data:
- Such as fingerprints and a photograph.
- Wait for Processing:
- Processing time varies.
- Collect Your Passport:
- Once processed, retrieve your passport.
- Check Visa Validity and Conditions:
- Understand the terms before traveling.
How to Apply for eVisa?
Upon arrival at the airport, travelers must present a digital "visa issuance notice" on their smartphones. This notice requires internet access for verification. Any form other than a digital notice, such as a PDF, photo, screenshot, or printed copy, will not be accepted. It's crucial to ensure internet connectivity for a smooth eVisa process at the airport.
How to Display “Visa Issuance Notice"
- At check-in, display the “visa issuance notice” on your device.
- The travel agency provides a "Visa Issuance Notice" with a two-dimensional barcode (printed or in PDF format).
- Scan the barcode with your device, enter required information, and tap “Display” to show the electronic notice. The countdown timer begins immediately, validating your eVisa.
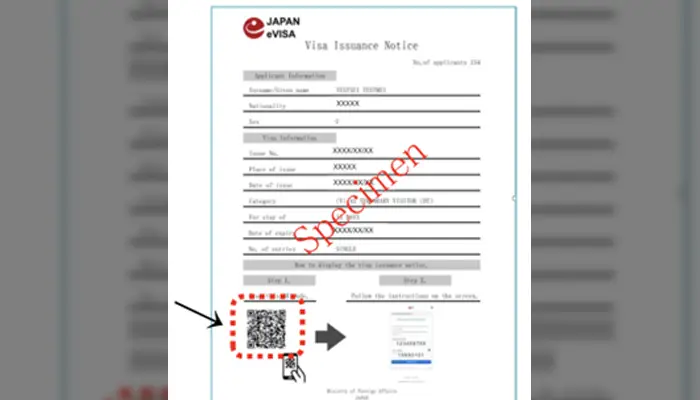
- Scan the two dimensional barcode printed on the “Visa Issuance Notice” (pdf). Please note that the two dimensional barcode will be given individually.
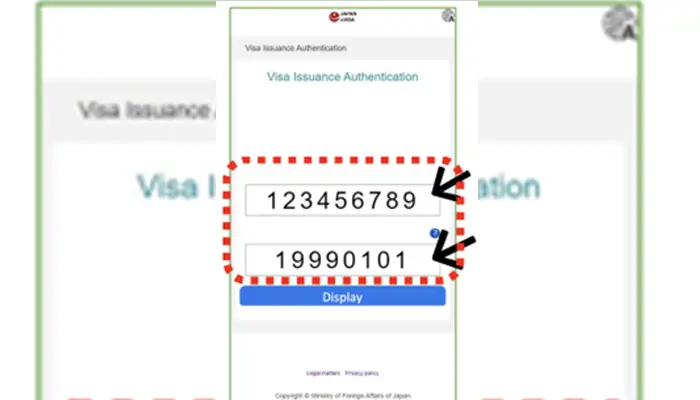
- Enter required information then tap “Display”
- Visa issuance notice” will be displayed on your device. Make sure the timer counts down at the top right.
Always verify the latest requirements on the official website before applying.